
Account Set Up
- Account Subscription
- Account Settings
- Import/Export Data
- Business Logo
- Customizable Labels
- Rates
- Flexible Billing Templates
- Task/Activity Codes
- Taxes
- Annual Targeted Hours and Rates
- Abbreviations
- Configure SSO (Single Sign On)
Account Subscription
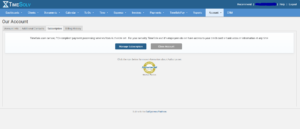
The Subscription tab is found under Account>Our Account and is where you enter information about the main contact at your company, as well as the billing and payment method. Your payment method can be changed at any time, although the changes will not take effect until the next billing cycle. You can enjoy your TimeSolv account without the worry of your service expiring or being interrupted for renewals if you keep payment details updated under this field.
Click on Account>Our Account>Subscription.
Enter valid payment and billing details. TimeSolv utilizes secure, PCI-compliant payment processing services through Authorize.Net.
The updates include updating the “Subscription” tab text, removing the “Review Primary Business Address” panel, and adding a trial mode “Subscribe” button directing users to the subscription screen.
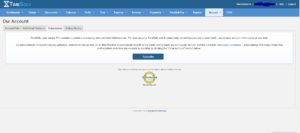
Upon completing the process, users return to the ‘Subscription’ tab with options to manage subscription and close account. This integration ensures secure payment processing and seamless billing updates through processor.
For your security, TimeSolv and its employees do not access your credit card or bank account information at any time.
Note: The address entered must be the same as your bank account’s billing address.
![]()
Account Settings
Account Settings is where Administrators can define certain firm-wide settings. Any changes made here apply to all the firm’s Timekeepers.
Click on Account>Settings>General to access firm settings.
Note: Firm-wide settings can be set under the Account and Settings link. Users can also upload a logo for use on bills and project reports and client portal login, customize fields, and set up the firm’s overall brand. Any changes made here apply to all the firm’s Timekeepers.
Firm Name – will appear on all forms of correspondence.
Timekeeper Label – how you would like your timekeepers to be labeled in the TimeSolv system fields (i.e. Associate, Consultant, Employee, Fee Earner, Professional, Resource, Staff Member, or Timekeeper).
Date Format – for use on invoices, statements, and reports, choose the date format.
Week Start Day – affects your calendar view
Australian Business Number – if registered with the Australian Business Register Online, only then you can enter your Australian Business Number (ABN).
Tax Labels – There are two tax labels that can both be customized. For example, you could use one label as an ‘Admin Fee’ and the other as a ‘Tax’. Or you may need to charge two different types of taxes that appear on two separate lines of an invoice.
Tax ID – may read differently if you have changed the above field of ‘Tax Label’ to a customized label.
Apply Tax 2 on Tax also – enabling this means the second Tax (‘Tax 2’ field) will tax the first tax (‘Tax 1’ field). See the example below:

Session Timeout Duration (hours) – the length of time a user can remain logged on to the TimeSolv web app but inactive. TimeSolv automatically ends a timekeeper’s session once this amount of time has elapsed. For example, if you would like inactive users to be automatically logged out after 30 minutes, enter 0.5.
Two-Factor Authentication – helps with improved security, increased productivity and flexibility, lowered helpdesk and security management costs, reduced fraud, and ability to build secure online relationships. If enabled, the administrator can decide if the authentication will be required with every log in, daily, weekly, or monthly.
Password Expiration – days will be counted from whenever the user last changed their password up until the firm’s setting. If the password is expiring within the next five days, a warning will be shown after login.
Access to Assigned Matters/Projects Only – firm users will only be able to access the Matters/Projects that are assigned to them.
Enable Dashboard – this is a graphical representation of hours, amount and billing rate for the whole year. The dashboard is visible to all administrators for all users. It is visible to non-administrative users by permission. Administrators can create additional contact information for the firm other than the main contact details. Additional contact information can be a useful feature when it comes to flexibility with your billing details.

![]()
Import Data from Older Billing Software
TimeSolv’s importing capabilities make it easy to move and/or sync your data across a number of applications, whether it be old legacy software like Timeslips or accounting software such as QuickBooks, or even to pull data from a simple Excel spreadsheet.
Import
Under Account>Import/Export>Import users can select to import:
– Abbreviations
– Clients
– Client Billing Category
– Client notes
– Contacts
– Expenses
– Expense Codes
– Matters
– Matter Billing Category
– Matter notes
– Related parties
– Sub-task codes
– Task codes
– Time
– Client Custom field
– Project Custom Field
– Recurring Expense
– Project Previous Balance
– Staff Member
Client Custom Field – (‘Custom Fields’ can currently only be generated in CSV format due to technical limitations)
Matter Custom Field – (‘Custom Fields’ can currently only be generated in CSV format due to technical limitations)
Select the entity to be imported, and download an example Excel file to help represent how the data should be laid out for it to be successfully imported. It may take a few minutes for TimeSolv to import the file.
Note: You must import Clients before Matters.
For assistance transferring data from older billing software to TimeSolv, please contact TimeSolv Support at 651-687-0090.
Export
TimeSolv never holds your data hostage. Under Account>Import/Export>Export users can select to export:
– Clients
– Matters
– Client/Matter contacts
– Task codes
– Sub-task codes
– Expense codes
– Time
– Expenses
– Invoices
– Payments & Allocations
– Ledger entries
– Client notes
– Matter notes
– Client Billing Category
– Matter Billing Category
– Client Custom Field
– Matter Custom Field
– Project Originating Staff Member
– Recurring Expense
– Project Previous Balance
– Staff Member
![]()
Business Logo
Upload or update your business firm logo for use on invoices under Account>Settings>Invoice Logo.
Note: If you get an error message from TimeSolv warning that the logo is too wide, you will need to resize the image to exactly 7 inches wide. Write down the inches of your logo displayed in the warning message, for example, ‘the logo is 8.123235 inches too wide.’
To make the uploaded logo appear on invoices, head under Invoices>Settings>Flexible Templates. Click on the Flexible Billing Template to open it for editing.
Under the Cover Page tab and Main Page tab ensure ‘Logo‘ checkbox is enabled, and select the desired alignment of the logo from the dropdown.

![]()
Customizable Labels
TimeSolv uses certain terminology by default, but you can customize the language/labels used in your account. Our TimeSolv App is extremely versatile and customizable to best suit your business needs.
With so much room to customize our app, it can often get confusing when viewing our Knowledge Base articles, as the terminology is based on the defaults and not universal. Below is a list of customizable labels.
Account Settings
Click on Account>Settings>General.
- Firm Label – Firm, Company, Partnership
- Professional Label – Associate, Consultant, Employee, Fee Earner, Professional, Resource, Staff Member, Timekeeper
- Tax Label – (unrestricted)
Client Settings
Click on Clients>Settings>General.
- Client Label – Client, Customer, Respondent
- Matter Label – Matter, Case, Engagement, Job, Project
- Related Party Custom Field Label – (unrestricted)
- Relationship Custom Label – (unrestricted)
- Default name for Trust – (unrestricted)
Time Settings
Click on Time>Settings>General.
- Activity Label – Task, Activity, Event
Expense Settings
Click on Expense>Settings>General.
- Expense Label – Cost, Disbursement, Expense
Invoice Settings
Click on Invoices>Settings>General.
- Invoice Label – Bill, Invoice
To-Do Settings
Click on To-Do>Settings>General.
- Phase Label – Phase, Job, Segment, Stage
- Plan Task To-Do Label – Plan Task, Item. Plan Activity, Action Item
- Milestone Label – Milestone, Deliverable, Event, Occurrence
![]()
Rates
One of TimeSolv’s greatest strengths is its flexible rate structure. Many firms will offer various rate options and some businesses consistently use the same billing scale and occasionally encounter exceptions. TimeSolv is designed to accommodate all of these needs. This frees you to focus on your work, instead of manipulating your time and billing system.
Default rates are set under the profile of each timekeeper. Click on Account>Professionals>[name]>Profile.
Note: Failure to enter an amount will result in Time Entries with $0 value for that Timekeeper.
Specify the Default Rate.

When entering client details, users must specify the rate to be applied. By default, the Timekeeper Default Rate is applied. However, there are additional, project-specific options.
Note: A rate set up at the Project-level overrides a rate at the Client-level. Thus, you can bill multiple projects for the same Client at different rates.
Choose which rate to apply under Clients>Clients & Matters>[matter name]>General.
TimeSolv’s rates are a form of hierarchy:
Timekeeper Default – the preselected default rate applied in the timekeeper’s individual settings for their typical rate. When no alternative is specified, the default rate will always be applied.
Task then Timekeeper Default – Timekeeper Default will be the standard rate applied unless the task code chosen for the entry has its own specified rate. The task code rate will then override any Timekeeper Default rate.
Global Rate – global rates are the customized rates saved under Global Rates section. Assigning a global rate to a client means that users have the benefit, for example, of giving the client a discounted rate of x% for all their time and expense entries. Or, for example, an ongoing case spanning over numerous years, can have a ‘2015 rate’ applied to it.
Task then Global Rate – Global Rate will be the standard rate applied unless the task code chosen for the entry has its own specified rate. The task code rate will then override any Timekeeper Default rate.
Matter Rate – Upon saving, an ‘Edit Rates’ button appears, allowing the user to specify the matter rate. Matter-level rates override Client-level rates.
Task then Matter Rate – Matter Rate will be the rate applied unless the task code chosen for the entry has its own specified rate. The task code rate will then override any Timekeeper Default rate.

![]()
Flexible Billing Template
This allows users to specify exactly what information appears on the invoices. Invoices can include as much or as little detail as required, and company letterhead and logos can easily be incorporated. Our billing templates allow users to assign different templates to different Matters for the same Client.
Under Invoices>Settings>Flexible Templates select the Flexible Billing Template.
Users can customize what to make available on Global Settings, Cover Page, Main Page, Service (hard costs/soft costs), Time, Expense, Statement Page, and Remittance Pages.
Global Settings
Compute Balance Due – As of the current invoice (displays transactions up to the currently displayed invoice only; invoice does not change).
Compute Balance Due – As of the current date (displays transactions up to the current day regardless of the invoice date).
Include Total Balance Due on Cover Page and Main Invoice – this will show any ‘previous balance’ on the cover page, main invoice, and remittance pages.
Combine Entries for Multiple Matters/Projects – applies to consolidated invoices and intermingles the entries.
Display Currency – the currency will not appear until you have gone under Clients & Matters>[client name]>General and specified the currency symbol in the ‘Currency’ field.

![]()
Task/Activity Codes
Identify the tasks or activities being used for clients, including the task/activity name and task/activity code.
For TimeSolv Legal users, the ABA Task, SubTask, and Expense Codes are pre-built into the TimeSolv application.
Custom codes can be set under Time>Settings.
TimeSolv’s Time Entry reports allow users to run a report based on Task Code, to view how much time has been spent on particular tasks for a given period of time or by a specific professional. This can provide greater insight into your firm.
Task/Activity rates can be by the hour or by the task. For example, users may charge by the hour for fact-gathering, or charge a flat fee each time a budget needs to be prepared for a client.
Note: If a Task Code rate is not included, the appropriate rate for the employee completing the Task is applied. This may not be the default rate, but the appropriate rate, depending on what is entered in the Matter’s General tab.
To access the Task/Activity setup click on Time>Settings>Task/Activity Codes.

To edit an existing code, click on the code number.
To create a new code, click on the New Task Code link.
Note: Users can create multiple Codes using the same UTBMS code so that firms can use their own internal codes that are then translated to a specific UTBMS code when generating LEDES invoice, and all associated entries can be aggregated and charged against the same UTBMS code in a LEDES invoice.
Description – what will be seen when a professional is entering time. [This is used at Time Entry, Task Code search/dropdown list.] An important note is that, for example, you may have a code AA101, and if you try to type it in the codes field under the time entry page, nothing will come up in the auto-population unless the code number is included in this description field.
Narrative – The default setting for what will be displayed when a Task Code is chosen is under Time, Settings, and Set Time Entry Description. The narrative is the default message that pre-fills into the time entry description. This is a useful field if the user wants more than just the description of the activity code to show up.
Rate – optional. Enter the dollar amount to be applied as a billable rate.
Rate Type – If a rate is specified, users must select a rate type – either hourly, or activity/task.
Summarized? – Ability to summarize the tasks on the invoice.
Taxable – This field may also be used for admin fees. If you have a set rate for admin fees, you can enter it here.

![]()
Taxes
Depending on the location of your practice, you may need to add tax for either your time or expenses when generating invoices each month. With TimeSolv, you can set the taxable status of every client for both time and expenses.
The following sections describe how to change and modify tax settings to accommodate your taxation requirements.
Firm Tax Settings
Users can specify the firm’s default tax status at Clients>Settings>General>Taxable Status.
Users can specify Time tax rates under Time>Settings>General.
Users can specify Expense tax rates under Expense>Settings>General.
Taxable Clients
Click on Clients>Clients&Matters>[client name]>General.
Taxable Status – choose between Not Taxable, Taxable or Taxable by Task/Activity.
Specify a Time Tax Rate (%) and Expense Tax Rate (%).
Override Firm Setting – Tax rates specified under Time>Settings or Expense>Settings will be overridden.

Taxable Activities
Click on Time>Settings>Task/Activity Codes.
Click on the code number to edit, and enable the Taxable checkbox.
Taxable Expenses
Click on Expense>Settings>Expense Codes.
Click on the code number to edit, and enable the Taxable checkbox.
Taxable Invoices
Click on Invoices>Settings>Flexible Templates.
Select the template in use.
Under the Main Page tab:
– Tax – There are two tax labels that can both be customized. For example, you could use one label as an ‘Admin Fee’ and the other as a ‘Tax’. Or you may need to charge two different types of taxes that appear on two separate lines of an invoice.
– Tax ID – may read differently if you have changed the above field of ‘Tax Label’ to a customized label.
– ABN (Australian Business Number) – if registered with the Australian Business Register Online, only then you can enter your ABN.

Note: If firm settings have customized Tax label it will appear according to the customized terminology, e.g. Admin Fee instead of Tax.
Tax Reports
Click on Reports>Tax Listing.
![]()
Annual Targeted Hours and Rates
The Dashboard is a graphical representation of hours, amount, and billing rate for the whole year and is enabled under Account>Settings. The Dashboard is visible to both admin and non-admin users (by permission), but admin users have more rights than non-admin users.
Firm admins can view the Dashboard of any user in that firm.
A timekeeper can access the Dashboard page to view their Dashboard for Hours, Amount, and Rate, based on permissions.
Values are grouped by month and one year’s data is displayed. The timekeeper can specify a year to see values from that year.
To set annual targeted hours and billing rates:
Click on Dashboard>Settings>Targets and Permissions.
Set target hours and rates for each Timekeeper for the required year.

![]()
Abbreviations
TimeSolv allows users to create Abbreviations for frequently used words, phrases, names, or sentences which can be used later on in the description of time or expense entries.
Abbreviations can be used both for the online time entry or with TimeSync, can be created both at a firm level and at a user level.
Hover over the paper icon on the Time Entry screen to view the list of abbreviations as a reminder.

Firm-level Abbreviations
Note: The instructions below are for creating new abbreviations with TimeSolv. Users can alternatively import abbreviations from an excel file by clicking on Account>Import/Export>Import.
To add new abbreviations, click on Account>Settings>Abbreviations.
Tip: We recommend using lowercase letters for abbreviations, in case a Matter/Project name is capitalized in the same letters which may confuse a Timekeeper into thinking that the abbreviation is in reference to a particular Client.
Timekeeper-level Abbreviations
Each Timekeeper can have its own abbreviations list aside from the firm-level ones.
Click under Account>Professionals>[name]>Abbreviations.
![]()
Configure SSO (Single Sign-On)
SAML SSO is supported in TimeSolv. Firm Administrators can follow the instructions below to set up SSO configurations for their firm.
In order to set up SAML SSO for your firm, go to the following url and click ‘Open SSO Configurations’

Once you click the above link, the following configurations page will open:

On this page, select your ID provider and Export the SP metadata XML file.
Import this sp metadata file in your IDP and set up claims accordingly.
Note: You must specify a ‘Name ID’ claim at the idp end as TimeSolv uses this claim to uniquely identify users.
The ‘Name ID’ is the claim that TimeSolv would use to identify its user. The claim ‘Name ID’ needs to be passed into TimeSolv from ADFS. This would be the username defined in TimeSolv. For example, if the firm is using an email address as the username for their Timekeepers, then the email address must be set to the ‘Name ID’ claim from the idp.
The response back URL from idp to TimeSolv should be:
Click on the 2nd step ‘Idp Server Settings’.
The following screen will show up:

Download the idp metadata XML file from your idp and import it using the button ‘Import from Idp/federation0 metadata XML’.
Click on the 3rd step ‘SP Connector internal settings’ and then click ‘Show advanced options’ and note down the Default Login URL for your firm.
Set up this initial login URL in your app to authenticate users in TimeSolv via your Idp.

Note: TimeSolv does not currently support MFA. If being used by a firm, it will be bypassed by the SSO login.